
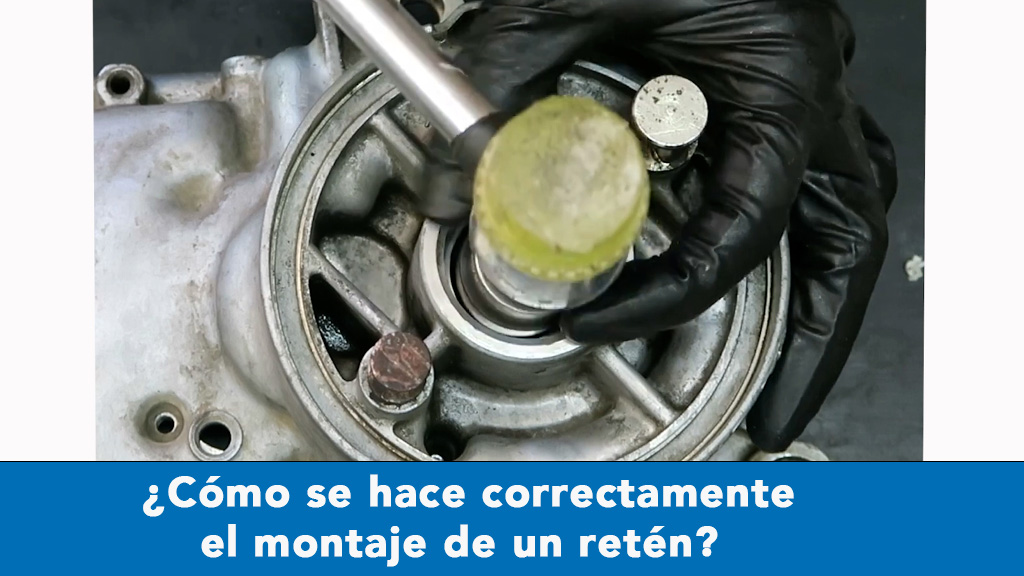
Oil seal installation guide
Installation methods play an important role in the function of oil seals. A good seal design without the proper installation method can lead to serious damage to the seal structure, resulting in malfunction or unwanted leakage. It is necessary to use the correct installation tools or follow the proper installation instructions.
The assembly of the sealing rings must be done with great care. The seal, shaft and housing must be clean, as dirt that may enter the system during assembly between the sealing lip and the shaft can cause leakage.
As the inner diameter of the seal must be stretched during assembly, the shaft must be chamfered.
- Angle for the chamfer should be approximately 30° to 50°.
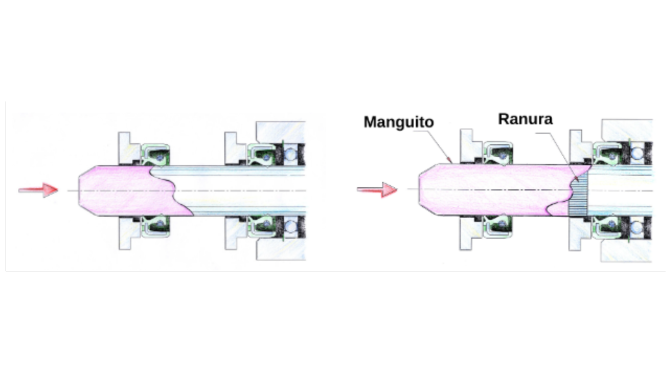
- When there is a groove in the shaft, a mounting sleeve must be used to protect the sealing edge.
- The housing chamfer must be at least 1 mm long.
- The sides must be robust.
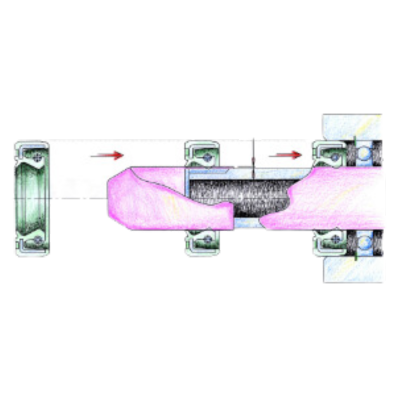
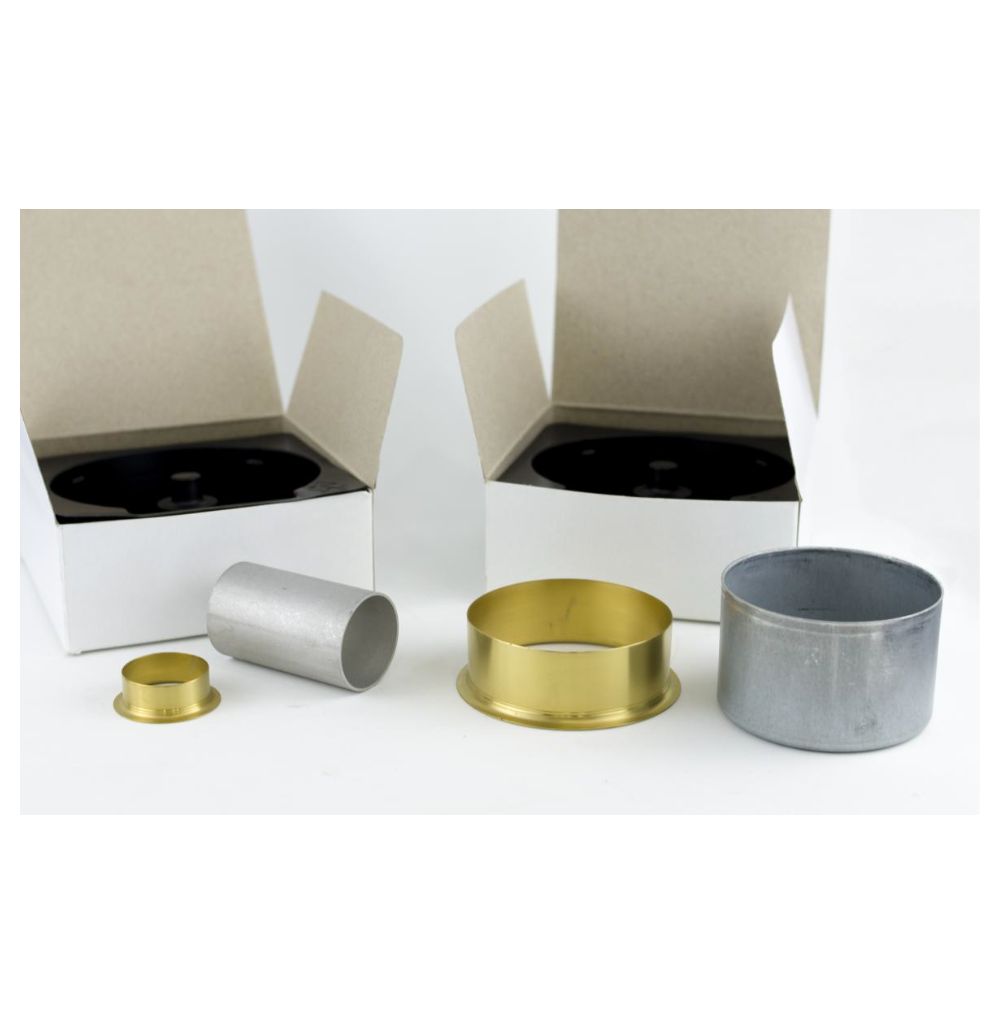
During assembly, it is essential to avoid damage to the seal. If the seal has to pass over irregularities, such as threads or splines, the shaft must be covered with an assembly sleeve, such as those offered in our repair kits for worn shafts.
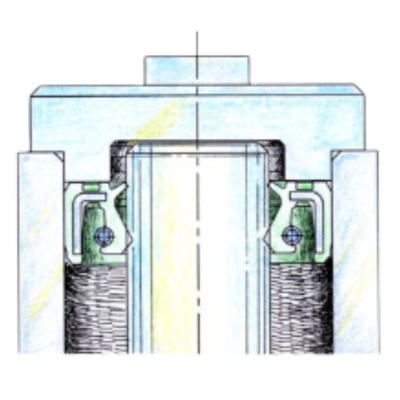
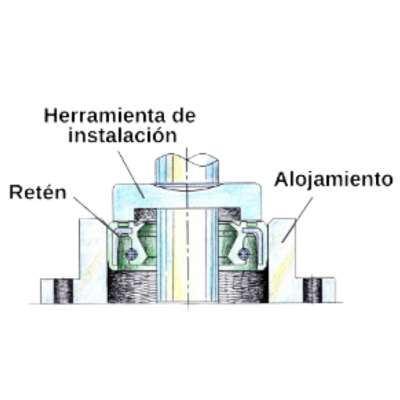
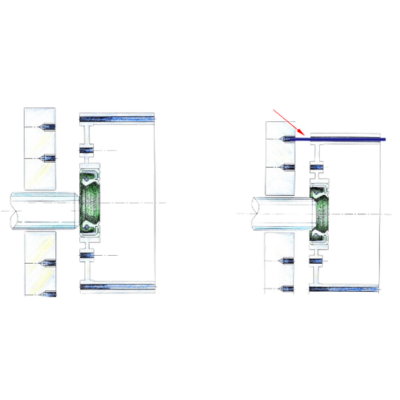
The seal must be pressed evenly into the housing. Preferably, an adapted fitting tool should be used, so that the pressure is transferred through the metal-reinforced part of the seal. It is recommended to use hydraulic presses or automated pneumatic pressure presses for pressing. If the installation force is provided manually by the operator, contact plates should be used. Without the contact plate, the manually operated shaft may damage the seal or cause leakage.
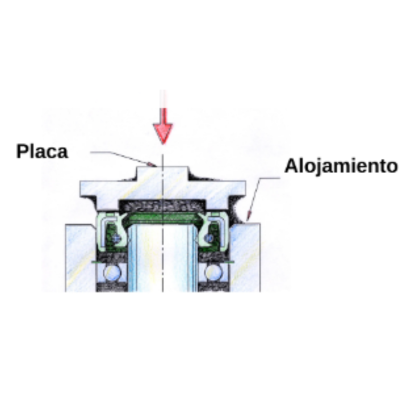
Correct Method
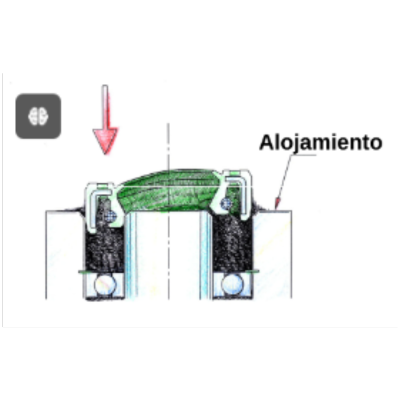
Incorrect method
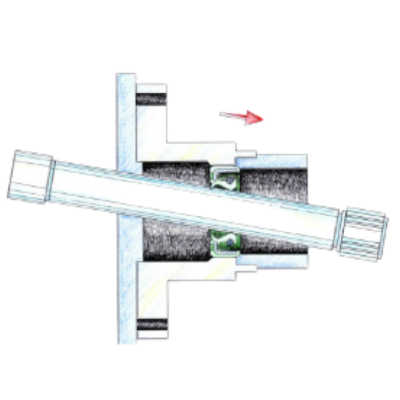
When selecting the installation tool, it should be noted that the tool and the contact position of the seal must be adequately supported (i.e. the housing) to avoid deformation of the seal.
Correct Method
Incorrect method
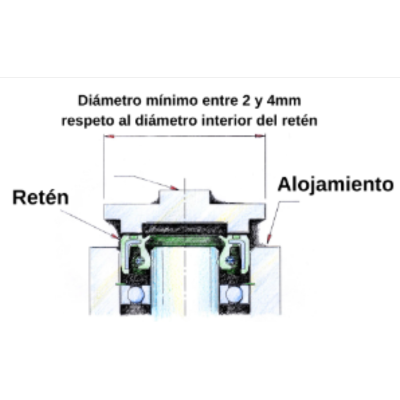
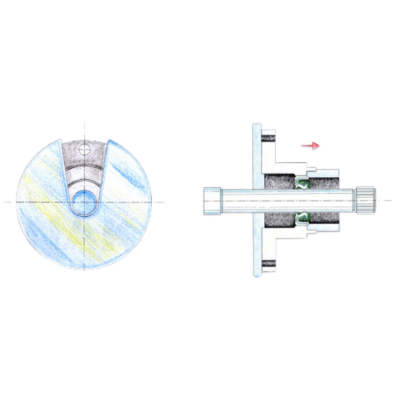
Depending on the direction of the seals, they can generate different deformation resistances in the housing. Based on this, we must choose the most suitable tool for the different applications. There are two common types:
Type 1: uses an impact plate to provide a uniform pressure force on the box.
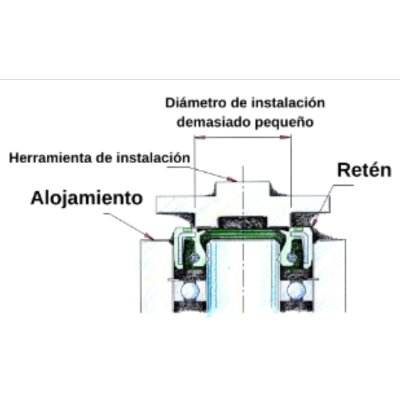
Type 2: use a staggered tool on the heel of the box.
We can conclude that the principles for choosing an installation tool are as follows:
- The pressure force can be evenly distributed over the contact area.
- The installation position of the tool should be located where the seal is most resistant to deformation.
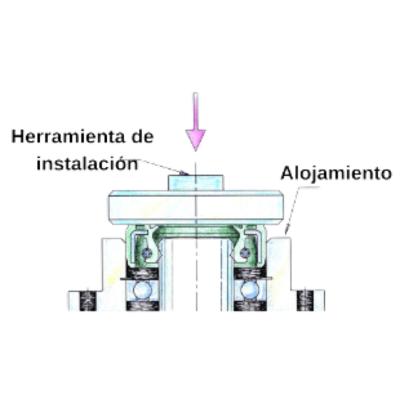
Type 1
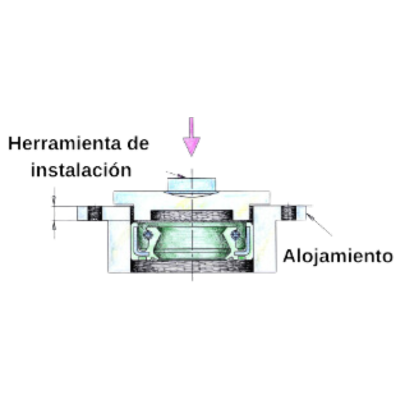
Type 2
Types of tools:
Type 1: use the tool designed for bottom pressure on the face of the housing.
Type 2: Use the tool designed to place the retainer in the bottom of a stepped housing.
Type 3: use the tool designed to bottom out on the shaft face.
Type 4: use the locating rod tool to stop against the bearing surface.
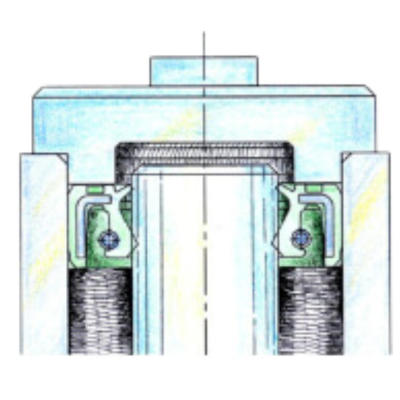
Type 1
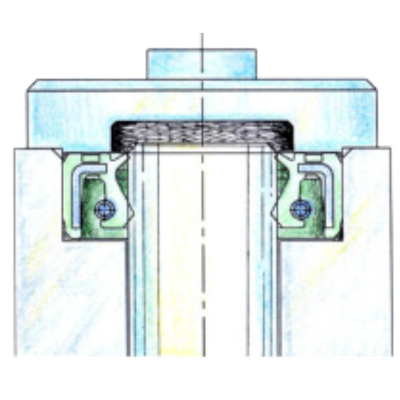
Type 2
Type 3
Type 4
If the shaft can damage the sealing lip during installation, a shaft repair sleeve should be used. At OSN we offer our worn shaft repair kits that prevent the sealing lip from being damaged during seal installation, preventing unwanted leakage.
Correct method
Incorrect installation can lead to seal problems. A slight knock can increase friction, which can cause increased wear of the lip, raising the lip temperature, leading to ageing of the rubber. This can lead to loss of sealing function of the seal.

Temperature rise with respect to shaft speed
Ensure a correct installation of the seal to the shaft, as a wrong location of the shaft will result in the loss of the sealing function of the seal.
Installation of the seal on the shaft splines
For heavy housings, the use of support points is recommended.
Incorrect Method

